Hole 1
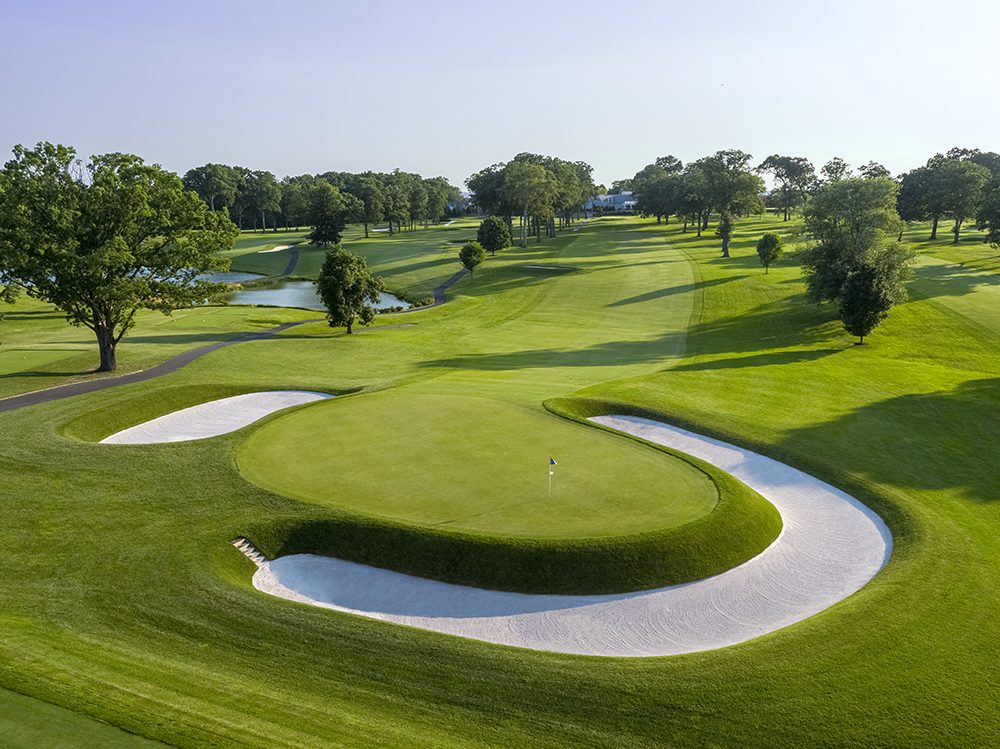
| Tee | Yards | HandicapHandicap | Par / |
|---|---|---|---|
| Black | 442 | 1 | 4 |
| Blue | 422 | 1 | 4 |
| White | 378 | 1 | 4 |
| Green | 412 | 1 | 5 |
Hole #1
The #1 handicap hole is a long and strong par 4. The tee shot should be played left center of the fairway bunker. Approach shots are played to a green that is surrounded by bunkering on all sides with a spine in the middle.
Hole 2
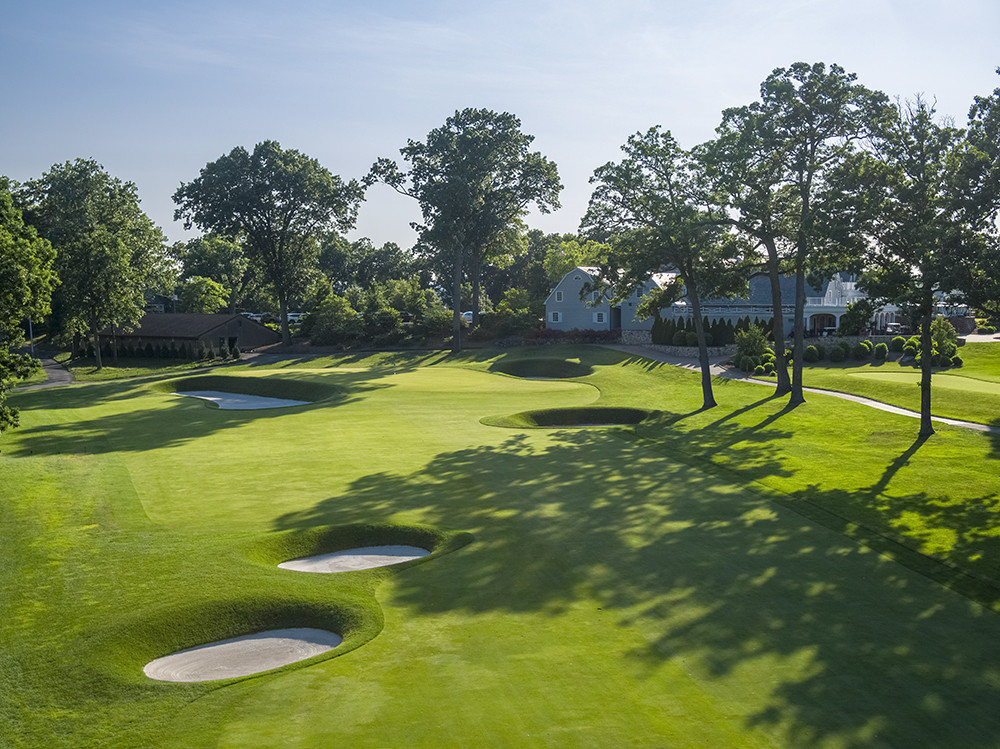
| Tee | Yards | HandicapHandicap | Par / |
|---|---|---|---|
| Black | 495 | 15 | 5 |
| Blue | 485 | 15 | 5 |
| White | 430 | 15 | 5 |
| Green | 416 | 15 | 5 |
Hole #2
A short and reachable par 5 that plays into the wind. The drive should be placed left center to avoid the fairway bunker, followed by a strong second to clear the cross bunker on the right side to reach the green in 2. Otherwise, play to the right for a short approach shot to the green. The green slopes back to front, with a false front with interesting pins placements on the right center of the green.
Hole 3
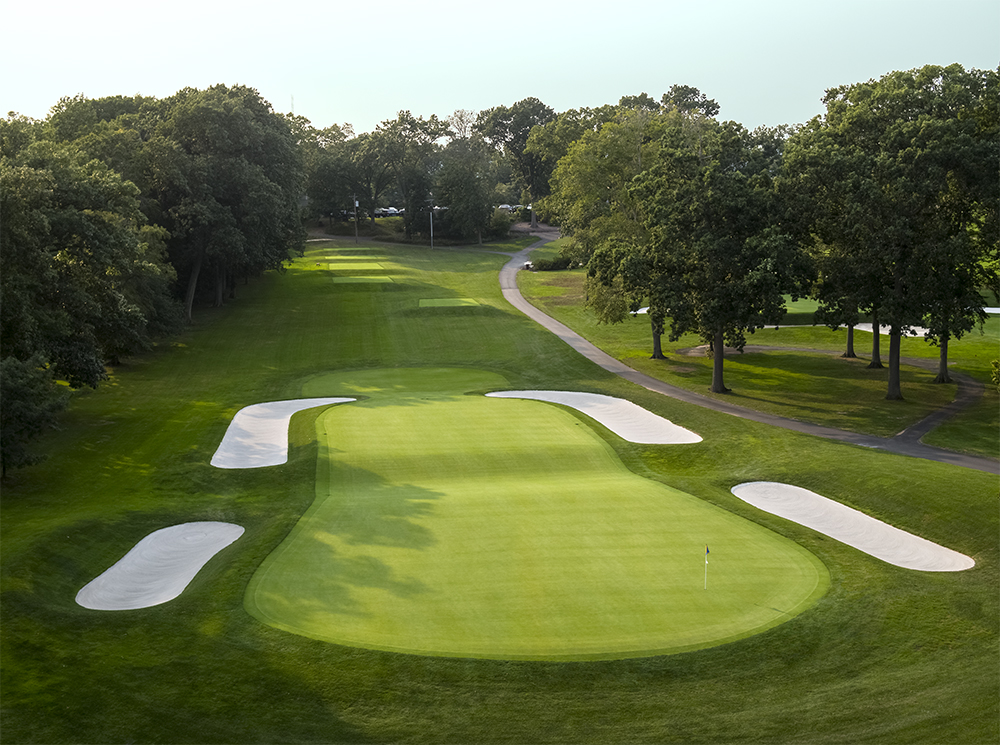
| Tee | Yards | HandicapHandicap | Par / |
|---|---|---|---|
| Black | 230 | 11 | 3 |
| Blue | 204 | 11 | 3 |
| White | 197 | 11 | 3 |
| Green | 150 | 11 | 3 |
Hole #3
The “Biarritz” is a template hole employed on most MacDonald, Raynor, and Banks courses. Hackensack’s is a par 3 with a deep depression separating two plateaus on a green that is 70 yards deep. The hole is usually cut on the back level; the golfer may choose to fly the ball all the way to the back, or land on the front and run the ball up.
Hole 4
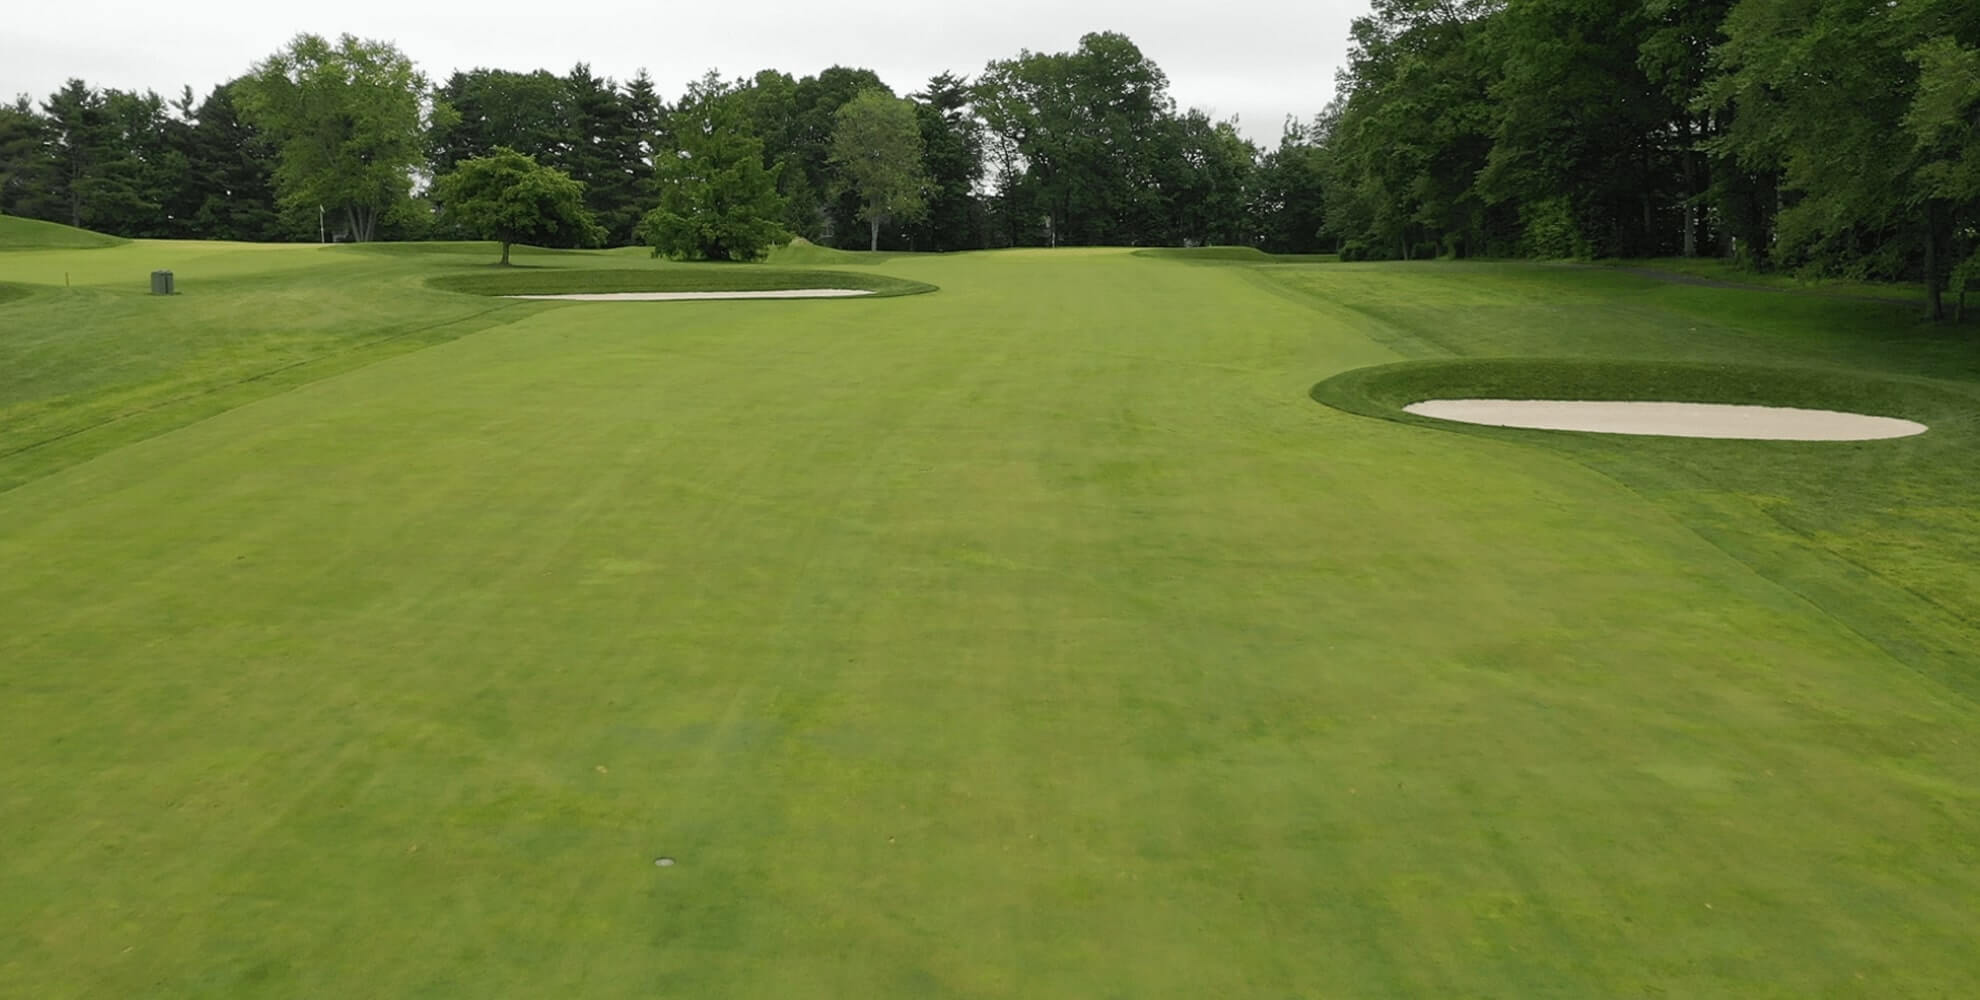
| Tee | Yards | HandicapHandicap | Par / |
|---|---|---|---|
| Black | 404 | 5 | 4 |
| Blue | 392 | 5 | 4 |
| White | 383 | 5 | 4 |
| Green | 373 | 5 | 4 |
Hole #4
A straightaway par 4 with a shot that must navigate the 2 fairway bunkers that pinch into the fairway. The green is flanked by 2 deep bunkers, and depending on pin placement, often the middle of the green is a smart play. It slopes from back to front, with a spine in the middle and with a false front that can cause short shots to run back into the fairway.
Hole 5
| Tee | Yards | HandicapHandicap | Par / |
|---|---|---|---|
| Black | 393 | 9 | 4 |
| Blue | 377 | 9 | 4 |
| White | 357 | 9 | 4 |
| Green | 296 | 9 | 4 |
Hole #5
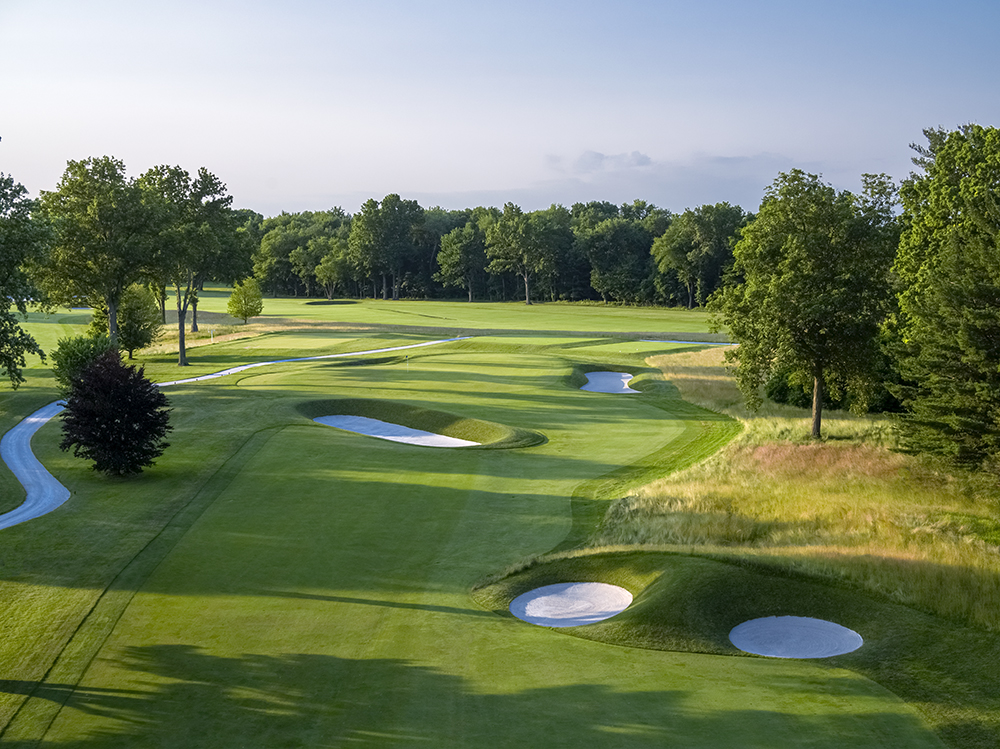
Strategy and club selection are important off the tee since the golfer must navigate both the “Principal’s Nose” that pinches into the fairway on the right side, and a cross bunker 50 yards from the green. The putting surface has front and back plateaus, as well as a false front. Placement on the proper plateau is critical.
Hole 6
| Tee | Yards | HandicapHandicap | Par / |
|---|---|---|---|
| Black | 160 | 17 | 3 |
| Blue | 142 | 17 | 3 |
| White | 132 | 17 | 3 |
| Green | 122 | 17 | 3 |
Hole #6
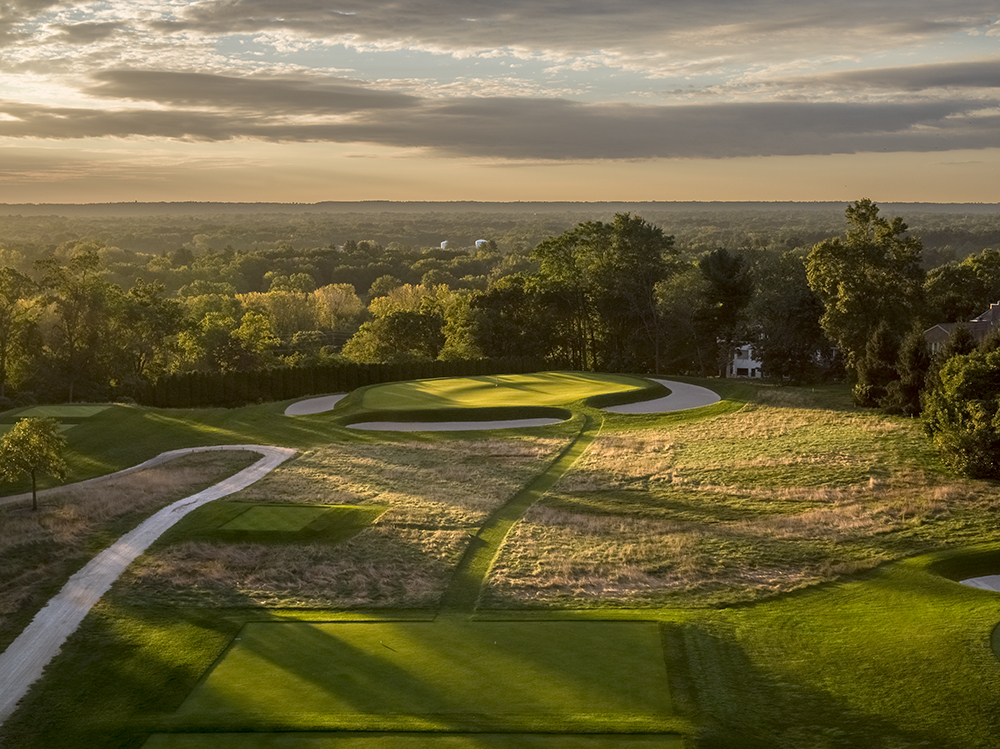
This is Hackensack’s par 3 “Short”—another template employed by MacDonald, Raynor, and Banks. The generous green is twice as wide as it is deep and is an island surrounded by bunkers. A horseshoe creates two levels on the putting surface; a ball landing on the wrong level will make two-putting a challenge.
Hole 7
| Tee | Yards | HandicapHandicap | Par / |
|---|---|---|---|
| Black | 398 | 13 | 4 |
| Blue | 378 | 13 | 4 |
| White | 355 | 13 | 4 |
| Green | 267 | 13 | 4 |
Hole #7
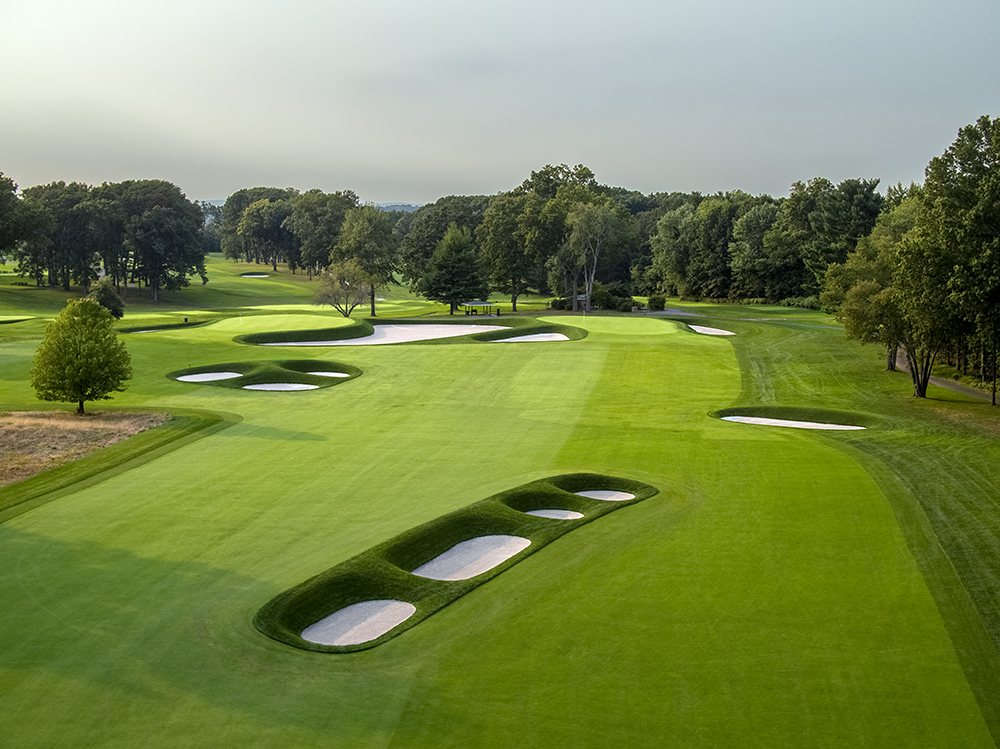
This medium-length par 4 usually plays into the wind, and features a set of dramatic fairway bunkers placed on a diagonal to the line of play, separating a two-level fairway. On the tee the golfer has the option of hitting left to a wider area, or to a tighter drive on the right. However, the drive to the right rewards the player with a much better angle into the green. Shots from the left must cover two deep bunkers fronting the entire left side of the green. The green slopes from back to front with a ridge in the middle.
Hole 8
| Tee | Yards | HandicapHandicap | Par / |
|---|---|---|---|
| Black | 575 | 7 | 5 |
| Blue | 534 | 7 | 5 |
| White | 510 | 7 | 5 |
| Green | 474 | 7 | 5 |
Hole #8
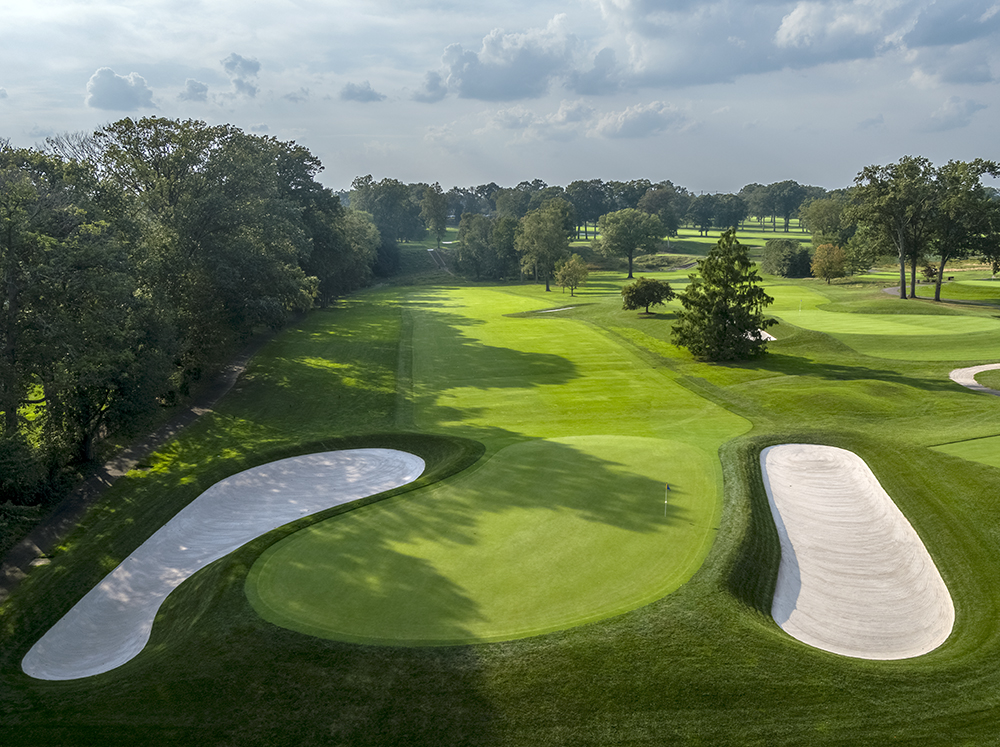
A par 5 and the longest hole on the course; only very long drives offer an opportunity to reach this green in two shots. Drives must avoid the lone fairway bunker on the right; players should position their second shots to provide the best angle into the green, which features left and right plateaus in the back and a significant back to front slope. A ball ending on the wrong plateau, or above the hole, makes a 3 putt a real possibility. There are 2 characteristically large, deep bunkers guarding the green on each side.
Hole 9
| Tee | Yards | HandicapHandicap | Par / |
|---|---|---|---|
| Black | 439 | 3 | 4 |
| Blue | 421 | 3 | 4 |
| White | 401 | 3 | 4 |
| Green | 346 | 3 | 4 |
Hole #9
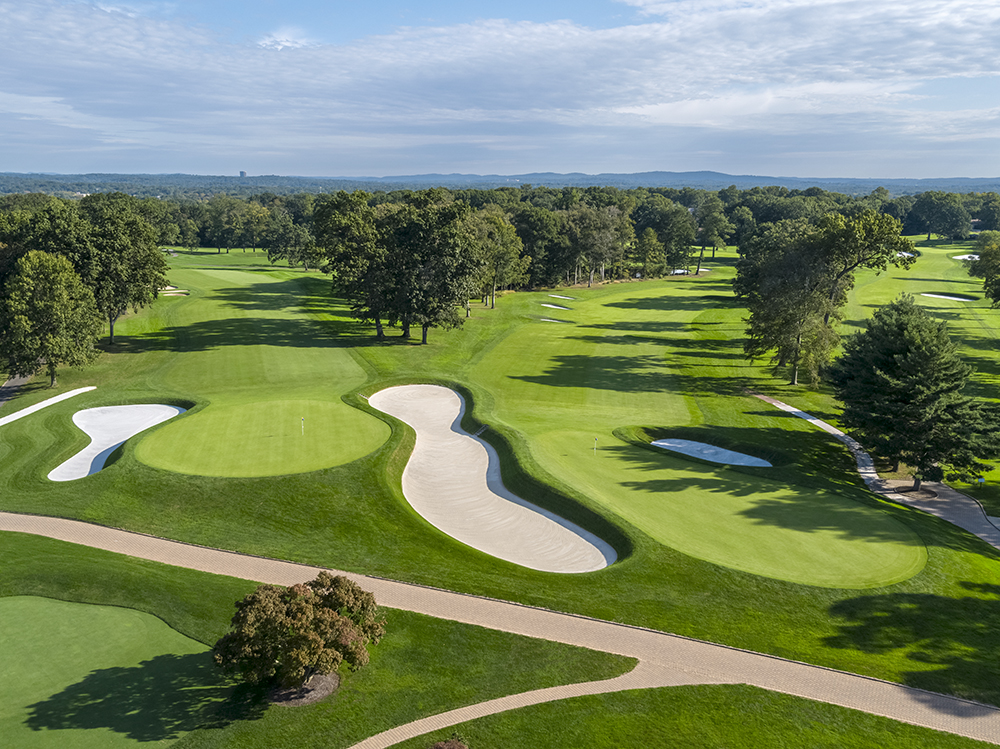
A long par 4 that plays slightly uphill, with fairway bunkers and trees on the right. Though flanked by bunkers on the left and right, there is a generous entrance to the green allowing players to roll approaches onto the putting surface. The green is sloped from back to front, with a shelf on the left side of the green and a false front that can create challenging front pin placements and make putts above the hole very difficult.
Hole 10
| Tee | Yards | HandicapHandicap | Par / |
|---|---|---|---|
| Black | 537 | 10 | 5 |
| Blue | 515 | 10 | 5 |
| White | 508 | 10 | 5 |
| Green | 468 | 10 | 5 |
Hole #10
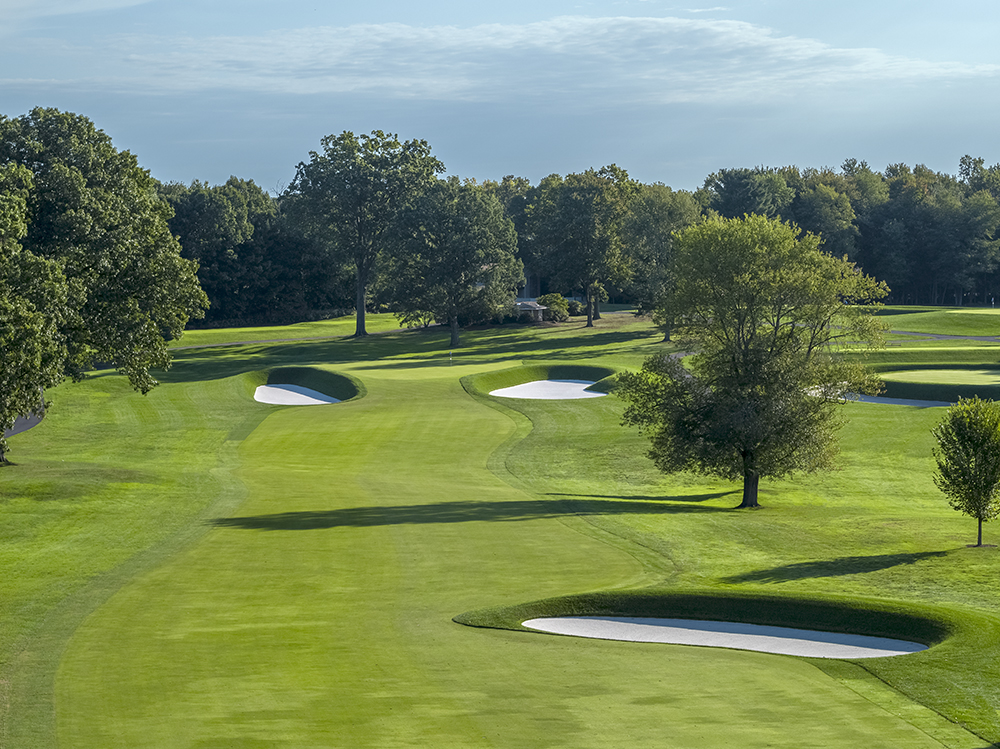
This par 5 plays slightly downhill and into a valley before rising to the green. The golfer needs to place their drive left of center to avoid the bunker that pinches into the fairway off the tee. The green is protected by 2 deep bunkers on each side of the green and runs from back to front with a spine in the middle and a false front. Back pin positions are protected by a collection area that will collect balls hit too deep.
Hole 11
| Tee | Yards | HandicapHandicap | Par / |
|---|---|---|---|
| Black | 441 | 2 | 4 |
| Blue | 425 | 2 | 4 |
| White | 404 | 2 | 4 |
| Green | 329 | 2 | 4 |
Hole #11
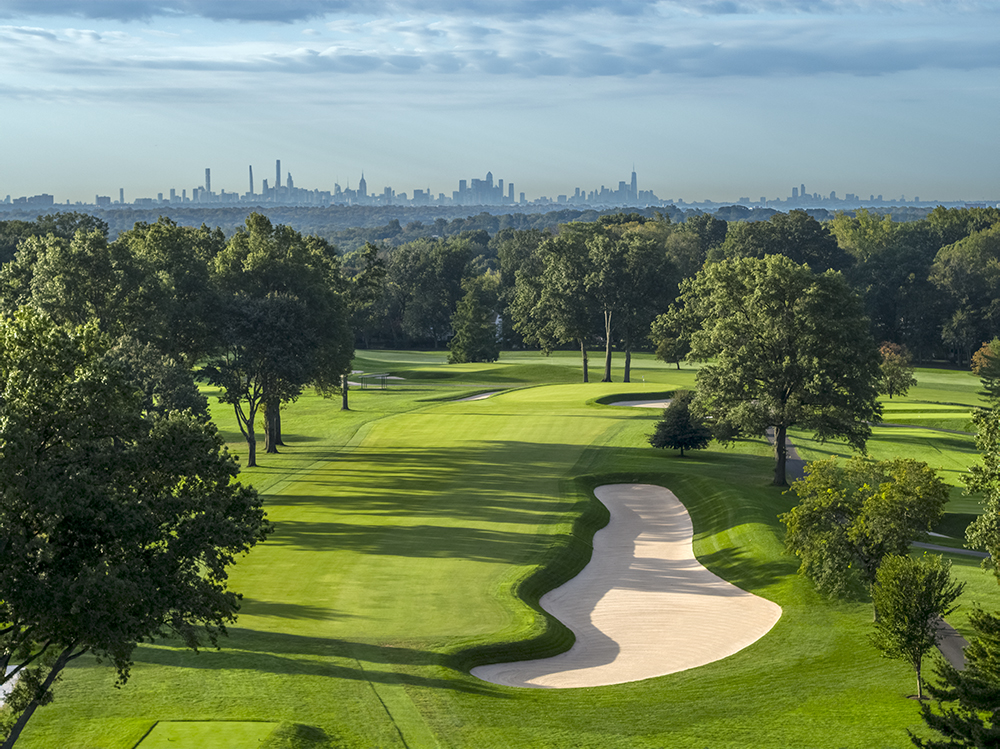
A long par 4 that bends slightly to the right and which requires a tee shot over a large expanse of sand on the right side. The putting surface is bunkered on both sides and slopes down from the back right to the left front. This hole can play very differently depending on pin positions, especially since many players will require a long iron or more to reach the green.
Hole 12
| Tee | Yards | HandicapHandicap | Par / |
|---|---|---|---|
| Black | 194 | 16 | 3 |
| Blue | 184 | 16 | 3 |
| White | 177 | 16 | 3 |
| Green | 139 | 16 | 3 |
Hole #12
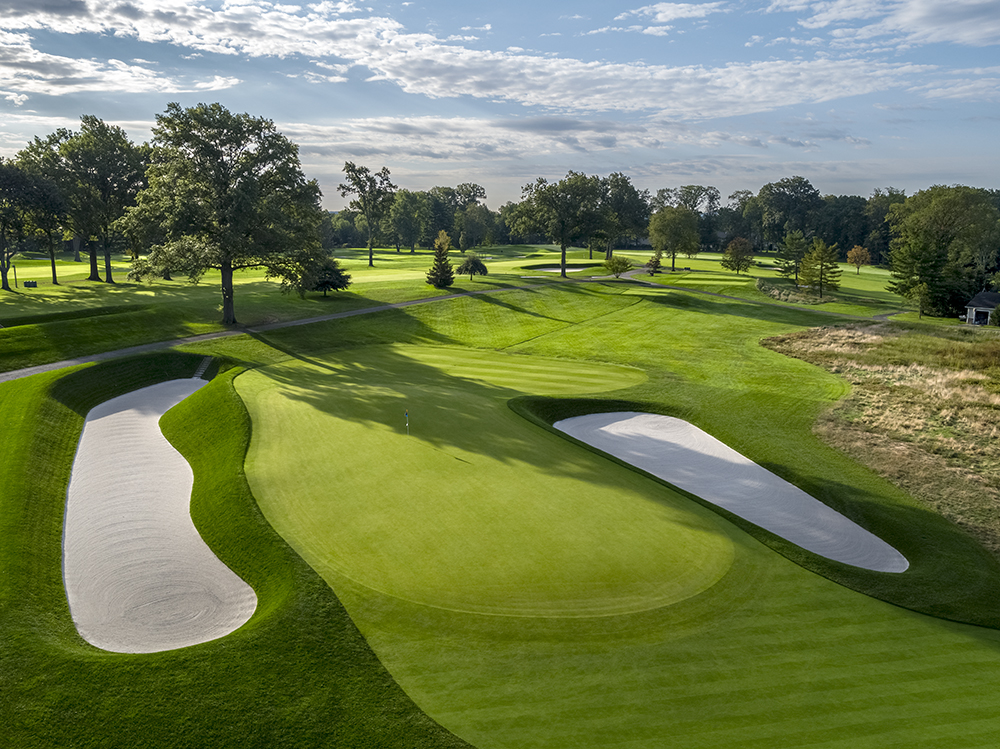
Another par 3 template favored by MacDonald, Raynor, and Banks; Hackensack’s “Redan” may be our signature hole. As with Redans the world over, it features a green that slopes from front to back. The green is set at an angle to the tee, sloping from front right to back left, and protected front left by a deep bunker, and back right by an even deeper bunker. The putting surface also features a spine on the left center of the green; balls that run through the green will find a collection area.
Hole 13
| Tee | Yards | HandicapHandicap | Par / |
|---|---|---|---|
| Black | 392 | 12 | 4 |
| Blue | 337 | 12 | 4 |
| White | 298 | 12 | 4 |
| Green | 278 | 12 | 4 |
Hole #13
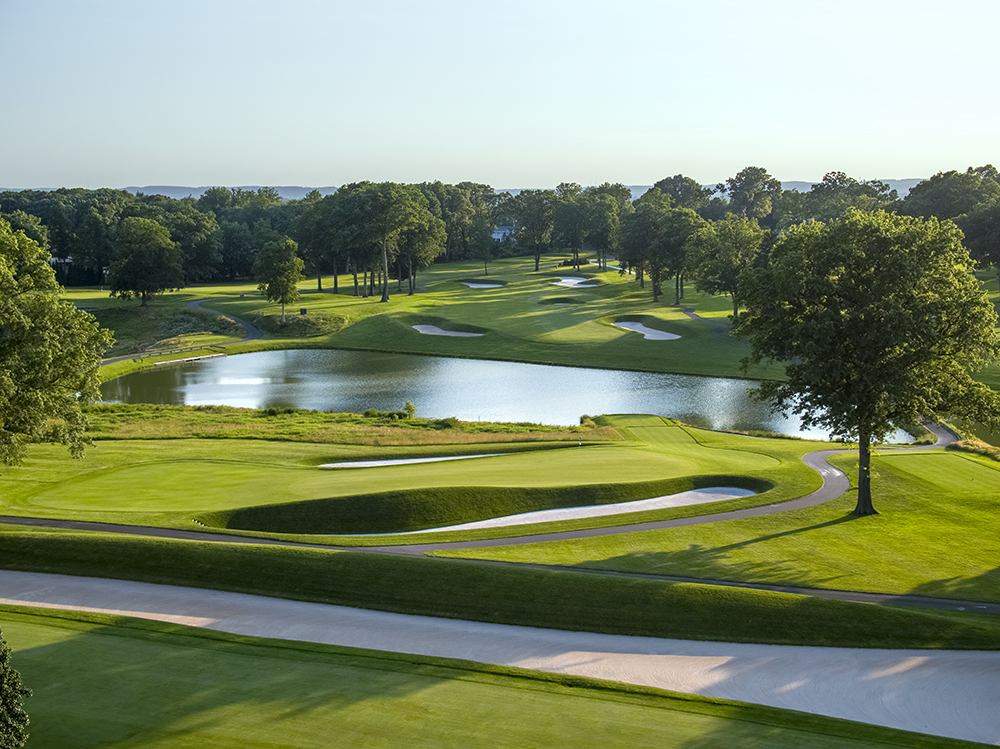
A short par 4 requiring good placement of the tee ball due to a pot bunker in the right side of the fairway. The fairway to the left of the pot bunker is large, but it requires an approach over a bunker guarding the left side of the green. Drives down the right side offer a better angle, but the green is surrounded by sand except for a small opening in the front. The green is sloped from back to front with a spine in the center of the green. Staying below the pin is critical as downhill putts are very difficult on this putting surface.
Hole 14
| Tee | Yards | HandicapHandicap | Par / |
|---|---|---|---|
| Black | 356 | 14 | 4 |
| Blue | 347 | 14 | 4 |
| White | 325 | 14 | 4 |
| Green | 290 | 14 | 4 |
Hole #14
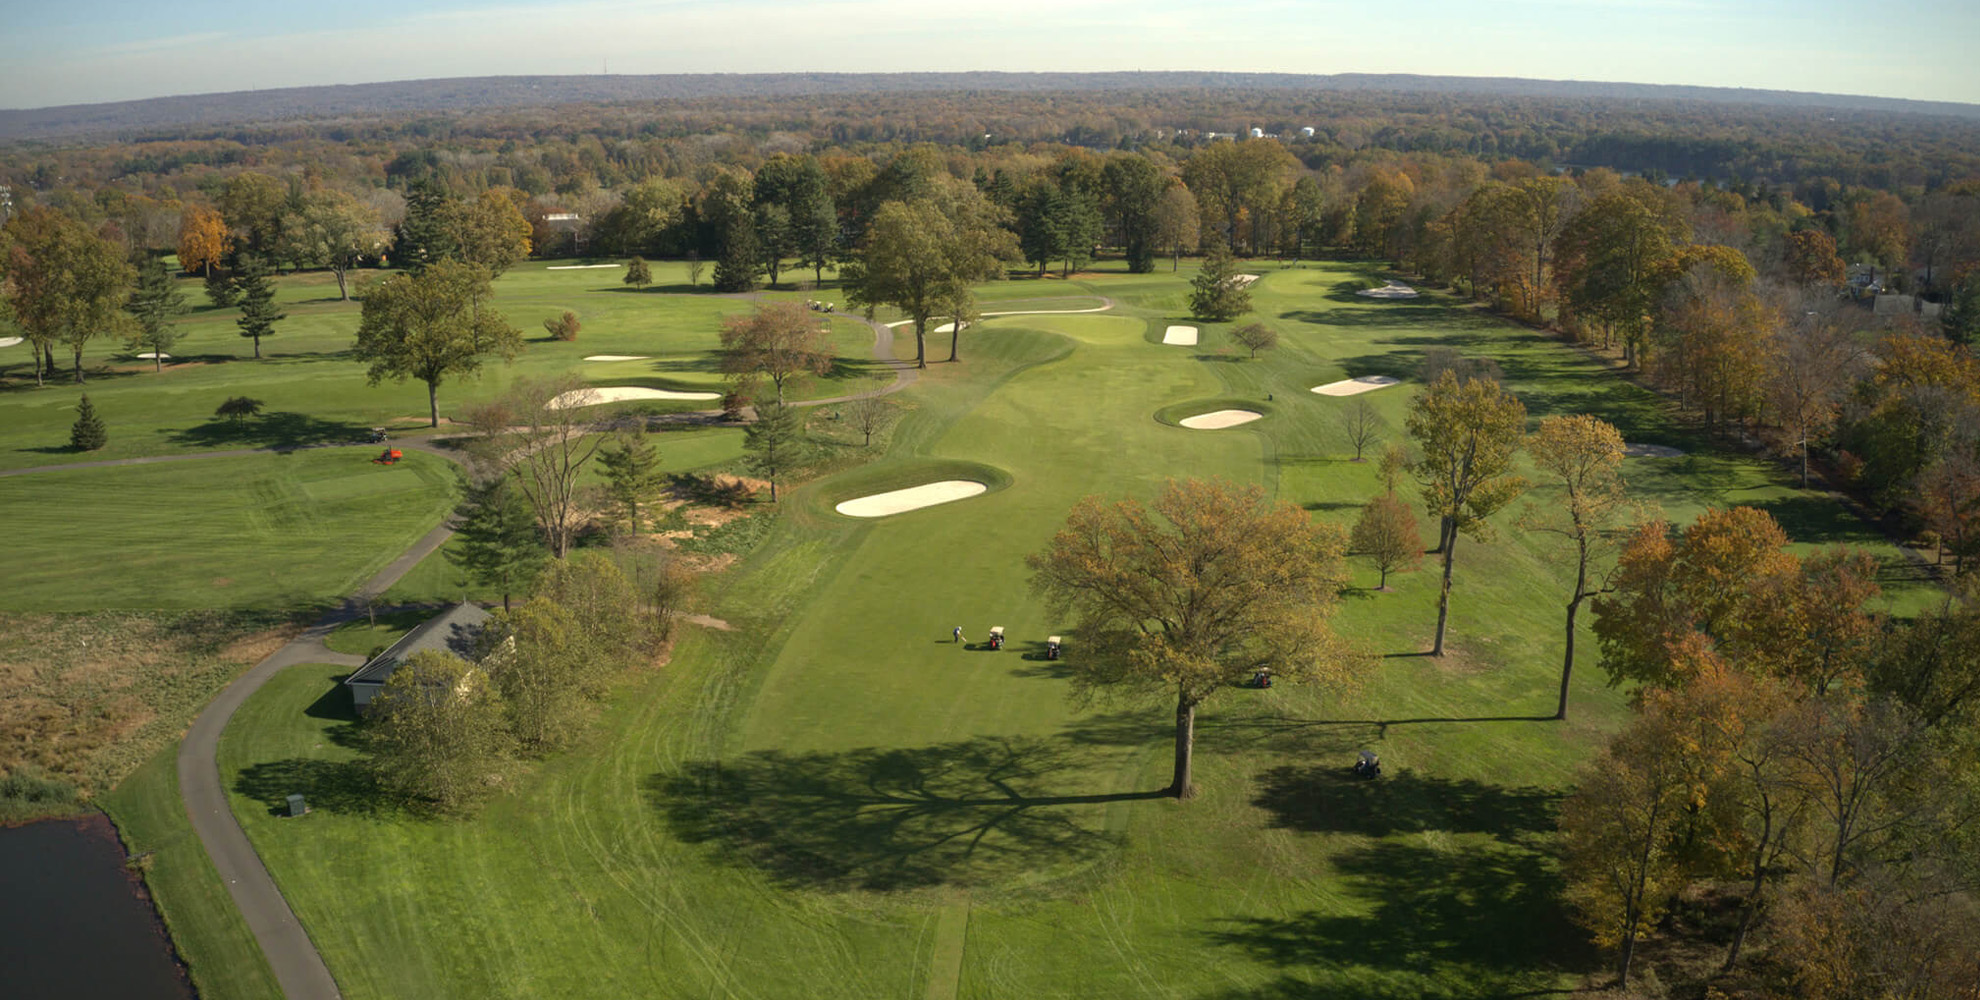
Another relatively short par 4 where changes in elevation make hitting the large green more challenging than the scorecard would indicate. A large tree in the lower right of the fairway and bunkers pinching in on the left and right require the golfer to place his drive with care. The putting surface features a left plateau fronted by a grass knoll making for a partially blind second shot if the pin is tucked left. The green runs back to front; getting up and down from the collection area in the rear is extraordinarily difficult, so most players play short of the pin.
Hole 15
| Tee | Yards | HandicapHandicap | Par / |
|---|---|---|---|
| Black | 549 | 8 | 5 |
| Blue | 512 | 8 | 5 |
| White | 502 | 8 | 5 |
| Green | 439 | 8 | 5 |
Hole #15
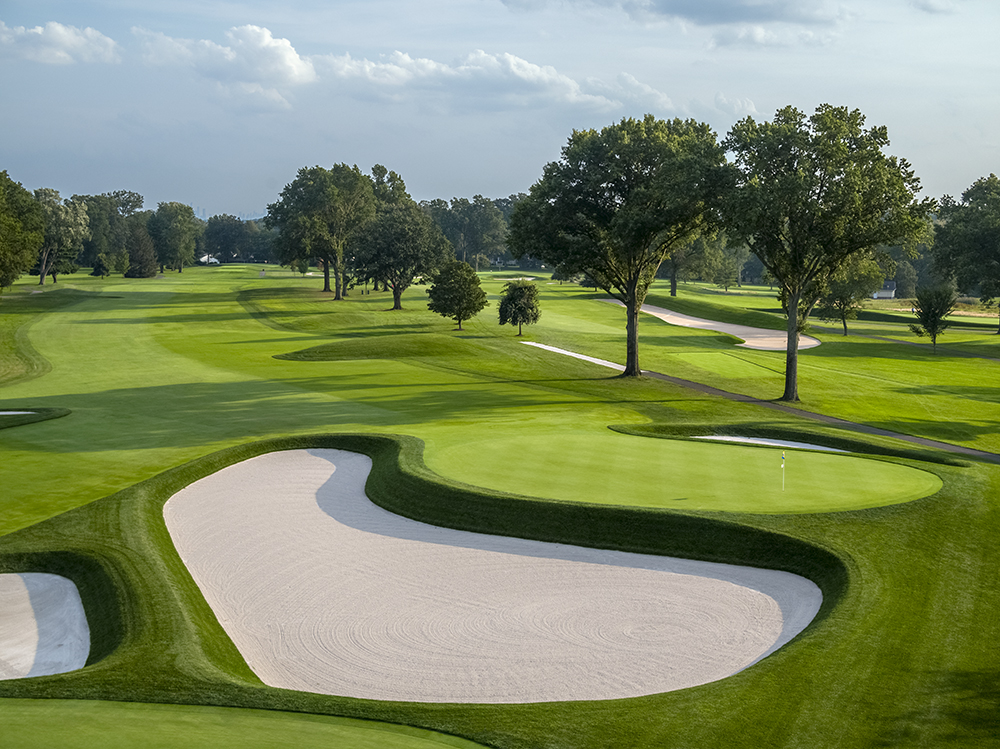
This par 5 requires golfers to hit their drive straight to avoid the two bunkers pinched into the fairway on the left and right. On the second shot the player will have to decide whether they can clear an exceptionally large bunker 115 yards from the green that hides part of the green, or bail out to the right and make sure they do not hit into the trio of bunkers on the right side. The green has a deep bunker on the left and an exceptionally large bunker on the right that is co-joined with the 7″ green. Missing the green left or right will make for a difficult up and down.
Hole 16
| Tee | Yards | HandicapHandicap | Par / |
|---|---|---|---|
| Black | 425 | 6 | 4 |
| Blue | 405 | 6 | 4 |
| White | 392 | 6 | 4 |
| Green | 384 | 6 | 4 |
Hole #16
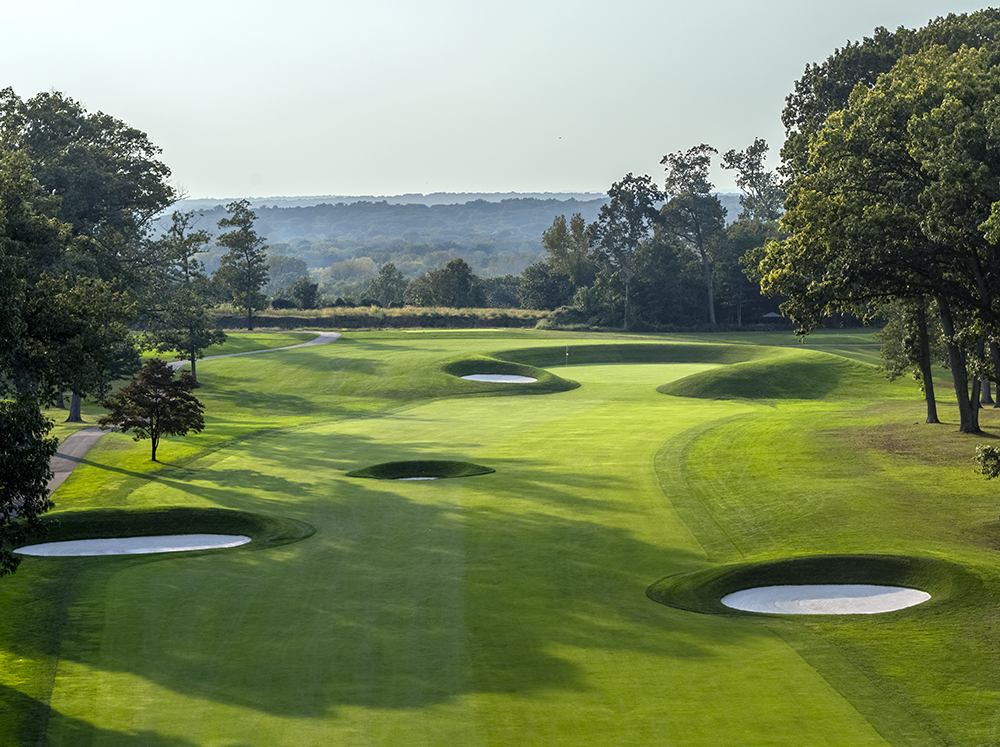
This long par 4 requires a drive that avoids a shorter bunker on the right and another 15 yards farther on the left. Long hitters must also avoid a pot bunker in the left center of the fairway. The green is surrounded by a mounded ring, creating a “Punchbowl”. The putting surface slopes from back to front, and putts above the hole (or shots remaining on the back of the Punchbowl) should be avoided.
Hole 17
| Tee | Yards | HandicapHandicap | Par / |
|---|---|---|---|
| Black | 170 | 18 | 3 |
| Blue | 160 | 18 | 3 |
| White | 148 | 18 | 3 |
| Green | 133 | 18 | 3 |
Hole #17
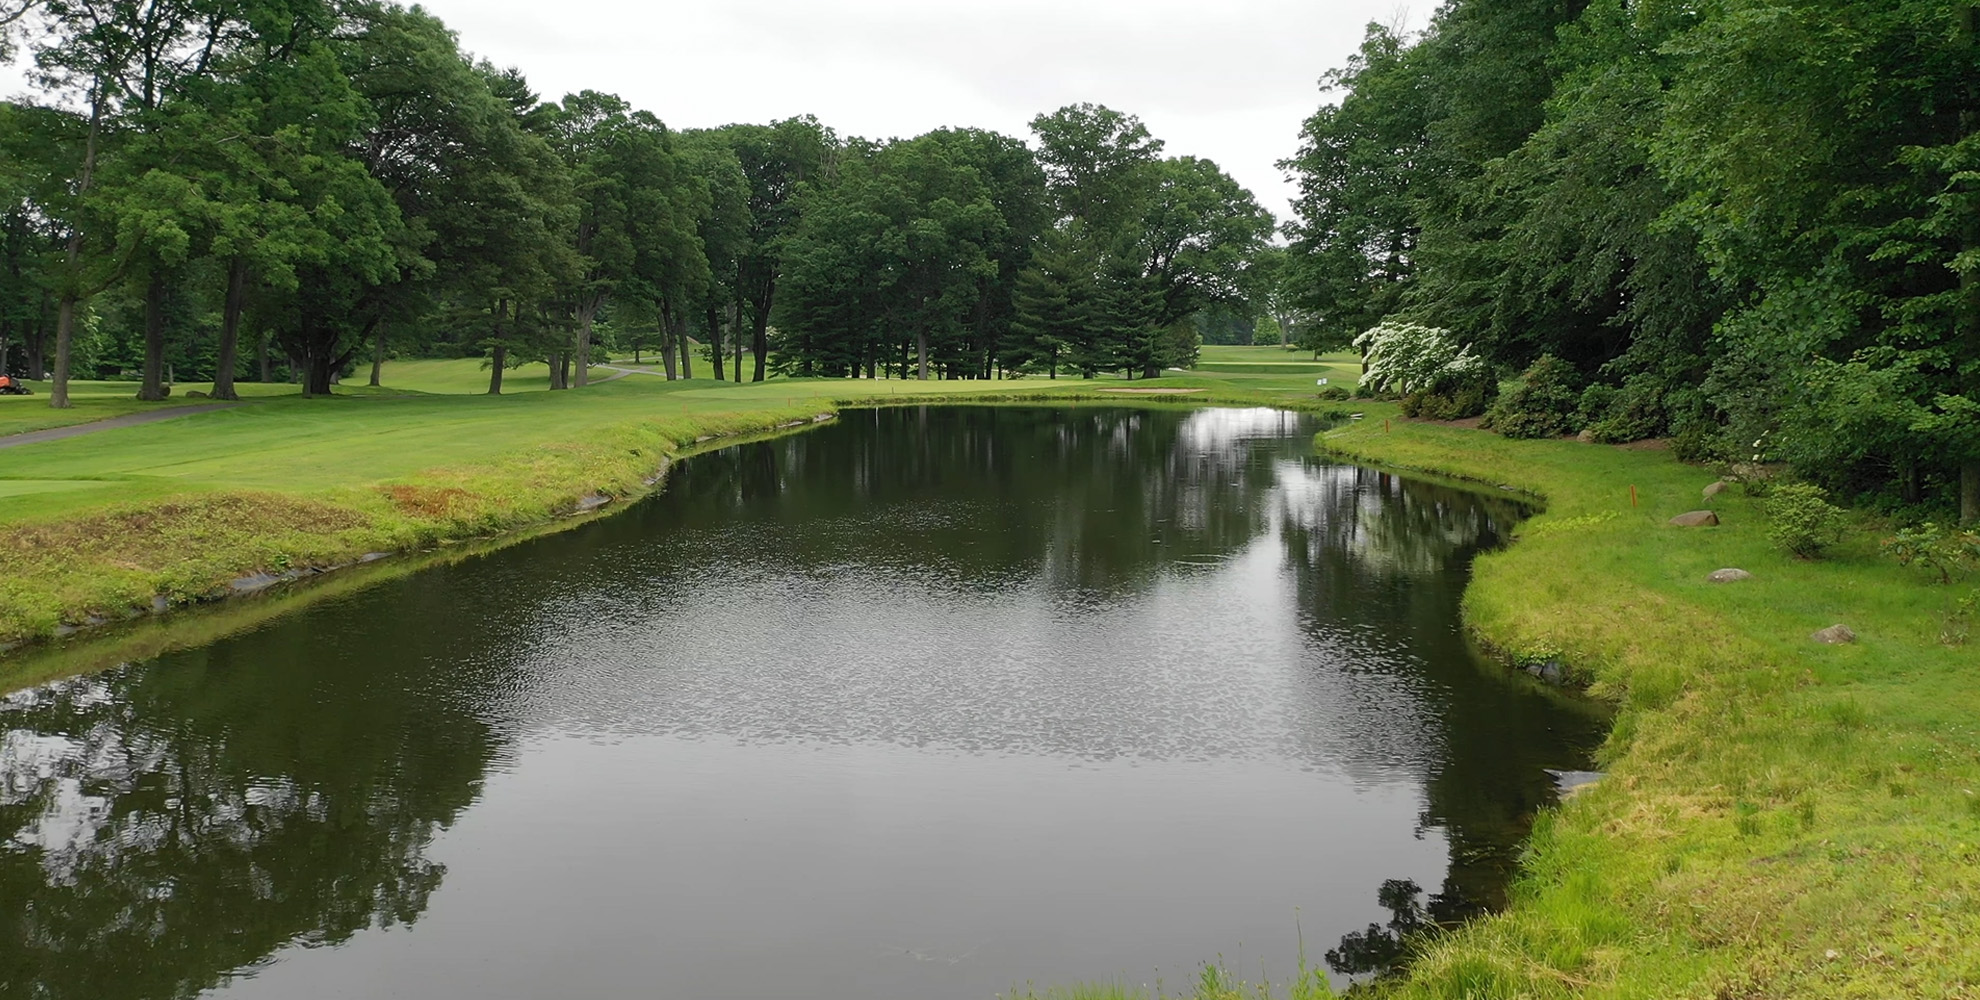
The only hole at Hackensack requiring an approach over water, this par 3 plays anywhere from 150 yards to 185 yards. The green is extremely deceptive, generally sloping back to front but with features that make putt reads difficult. A lone bunker sits beside the green on the right.
Hole 18
| Tee | Yards | HandicapHandicap | Par / |
|---|---|---|---|
| Black | 411 | 4 | 4 |
| Blue | 387 | 4 | 4 |
| White | 378 | 4 | 4 |
| Green | 332 | 4 | 4 |
Hole #18
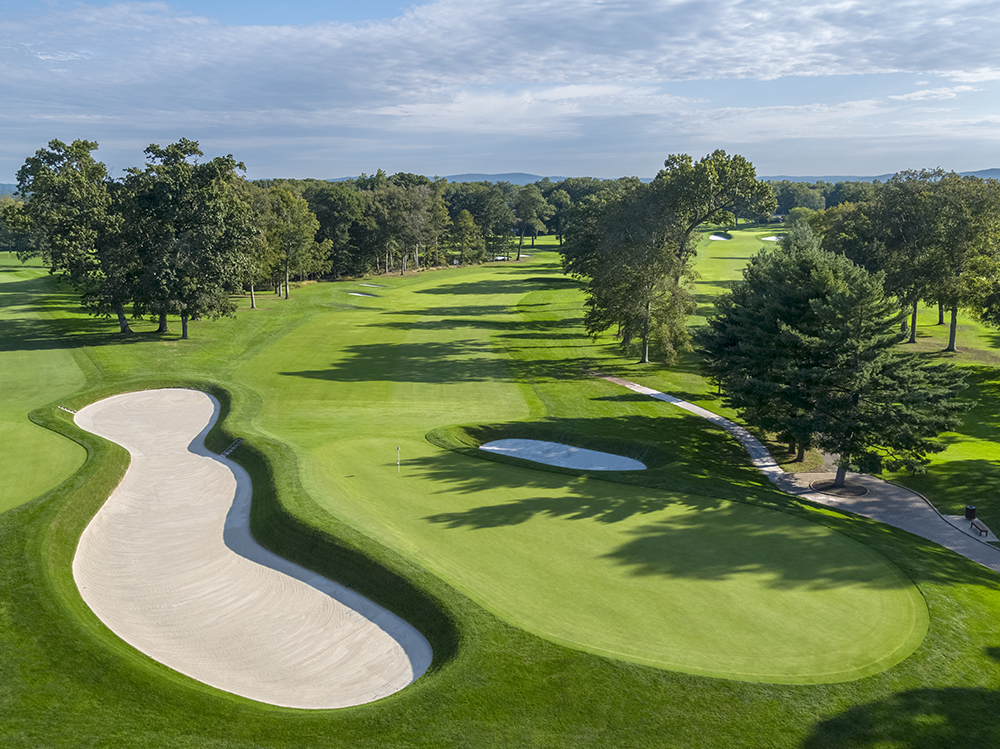
Hackensack’s finishing hole is an uphill par 4 requiring accuracy on both the drive and approach shot. Three fairway bunkers flank the fairway on the right, and a large, single bunker will capture long drives on the left. The hole curves left, rewarding a well-placed draw. Approach shots are played uphill to an elevated green with a large bunker on the right, and a deep bunker that will capture short shots on the left. The green is long and large, with a spine that runs through the middle. There can be a two or three club difference on the approach depending on pin position.
